The door to happiness
Posted: 19 December 2011 Filed under: Cabinet, Pinball Champ '82 | Tags: cleaning, coin door, pinball, zaccaria Leave a comment »
No, I’m not trying to sell you some guru meditation stuff. I just got my hands on a second hand coindoor for one of the machines and I’m happy with what I got at the price I got it!
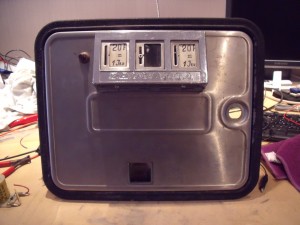
The door was complete and in ok condition. Rather dirty, but then agian, why would that door be any different from the others.
As you can see, someone had used paper stickers and electricians tape to cover the original plastic coin fronts. But otherwise, in very good shape.
Except for the middle coin selector, everything is there. Dirty, but there.
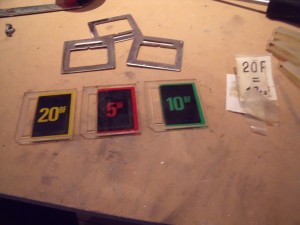
First thing I did was take apart the front bezel and cleared away the paper stickers and electricians tape. Since there were three, I suspected they were the Deutsch Mark ones, like in the Pinball Champ. The Devil Riders has Belgian Frank ones and there are only two.
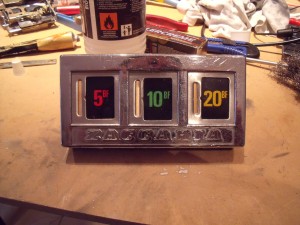
To my surprise, these are Belgian Frank ones. With hindsight I should have known. The door is from a Time Machine and they came out when the 10 Fr piece was still in circulation. When Devil Riders came out, it wasn’t.
The picture doesn’t do it justice. The chrome is damaged in two or three places, but it shines a lot. You can actually see my reflection in it.
At first my idea was to put this door in the Devil Riders, since some nitwit drilled a hole in the door to put a switch in to replace the outhole switch (I still get sick thinking of it). But then I decided to put it in the Pinball Champ. The frame looks a lot better and the door isn’t deformed, so it closes perfectly.
So after the usual dismantling, cleaning and reassembling, I installed it in the Pinball Champ and it looks great!
I added the reproduction sticker I got from David Gersic and now the Pinball Champ looks much better!
When the Devil Riders is finished, I’m going to set the coin selectors to 0.50 €, so if people really want to donate, they can.
In the mean time I also got that replacement coil for the popbumper in the Devil Riders and the part is back from the blacksmith waiting for reinstallation. That will be my next post.
Upper playfield reinstalled and head door done.
Posted: 11 December 2011 Filed under: Devil Riders, Playfield | Tags: cleaning, neon tube, pinball, playfield, zaccaria Leave a comment »
I finally got around to continuing the work on the Devil Riders. I finished the playfield as much as possible and disassembled the neon tube so I could get to the lamps in the backboard and clean everything up.
I’ve reinstalled the old flipperbats as the new ones are on backorder. Once they arrive, they will be installed. Unfortunately, I couldn’t find yellow flipper rubbers that are the right size, so I had to use black ones. If anyone knows where I can find yellow ones, please let me know.
Also, that metal part that was broken is still at the blacksmith, so the ball shooter lane hasn’t been put in yet.
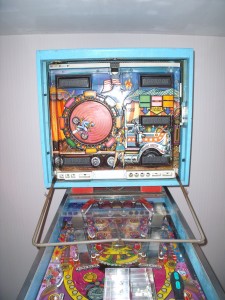
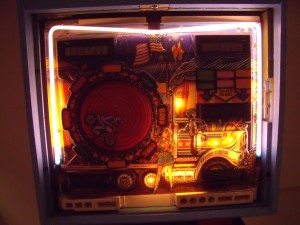
After that was done I started on the head door. I needed to get to the lights behind the plastic cover. For that I needed to remove the neon tube, but the rubbers isolating the connections are fused in place from 28 years of heating up and cooling down. I talked about it with Leon (flipper-pinball-fan) and David Gersic (Zaccaria-pinball) and they advised me to leave the rubbers and just undo the springs and put the neon on the playfield glass as carefully as possible.
Then I cut a slit on both sides of the plastic cover and took it off from around the neon tube leads. Worked like a charm and it’s impossible to see the slits now that the plastic cover is reinstalled.
When I checked out the neon more closely, I noticed some white spots on it. After close examination these where spots where the dirt had come loose… So I started cleaning the neon VERY carefully. The dirt, nicotine and tar didn’t come off very easily until I used one of those steel wool spunges used to clean cooking pots. The dust particles that came free from cleaning that way made me sneeze more than once.
I removed all the lightbulbs from the head door, tested them, cleaned and reinstalled the ones that still worked and replaced the faulty ones. The cover was cleaned too and reinstalled. Then I carefully put the neon back. The difference is huge, well worth the (little) effort and (considerable) risk.
Next up is a trip to the blacksmith and the CPU board.




 Flippers.be
 Videolan.org – The home of VLC