The door to happiness
Posted: 19 December 2011 Filed under: Cabinet, Pinball Champ '82 | Tags: cleaning, coin door, pinball, zaccaria Leave a comment »
No, I’m not trying to sell you some guru meditation stuff. I just got my hands on a second hand coindoor for one of the machines and I’m happy with what I got at the price I got it!
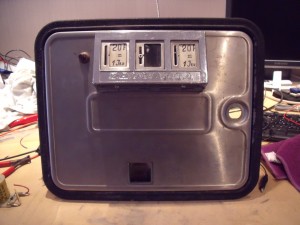
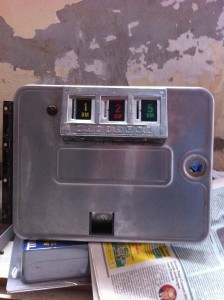
The door was complete and in ok condition. Rather dirty, but then agian, why would that door be any different from the others.
As you can see, someone had used paper stickers and electricians tape to cover the original plastic coin fronts. But otherwise, in very good shape.
Except for the middle coin selector, everything is there. Dirty, but there.
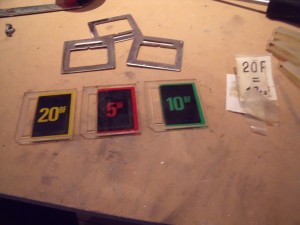
First thing I did was take apart the front bezel and cleared away the paper stickers and electricians tape. Since there were three, I suspected they were the Deutsch Mark ones, like in the Pinball Champ. The Devil Riders has Belgian Frank ones and there are only two.
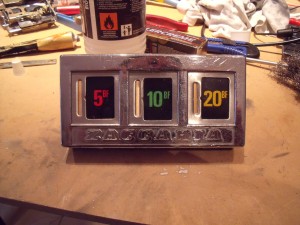
To my surprise, these are Belgian Frank ones. With hindsight I should have known. The door is from a Time Machine and they came out when the 10 Fr piece was still in circulation. When Devil Riders came out, it wasn’t.
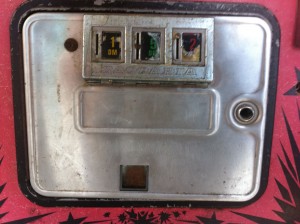
The picture doesn’t do it justice. The chrome is damaged in two or three places, but it shines a lot. You can actually see my reflection in it.
At first my idea was to put this door in the Devil Riders, since some nitwit drilled a hole in the door to put a switch in to replace the outhole switch (I still get sick thinking of it). But then I decided to put it in the Pinball Champ. The frame looks a lot better and the door isn’t deformed, so it closes perfectly.
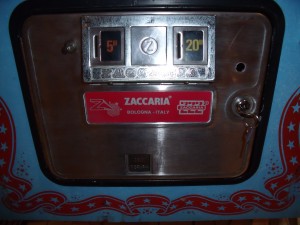
So after the usual dismantling, cleaning and reassembling, I installed it in the Pinball Champ and it looks great!
I added the reproduction sticker I got from David Gersic and now the Pinball Champ looks much better!
When the Devil Riders is finished, I’m going to set the coin selectors to 0.50 €, so if people really want to donate, they can.
In the mean time I also got that replacement coil for the popbumper in the Devil Riders and the part is back from the blacksmith waiting for reinstallation. That will be my next post.
Humpty Dumpty back together again
Posted: 18 October 2011 Filed under: Cabinet, Pinball Champ '82, Playfield | Tags: cabinet, legs, neck, pinball, zaccaria Leave a comment »
It’s starting to look like a pinball machine agian!
I’ve put the playfield back together and noticed that the left top flipper didn’t work and the right top flipper was weak. A quick pass with some sanding paper between the leaf contacts and they’re both tiptop again.
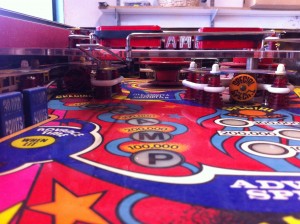
Here are some detail shots. Remember, I’m making this pinball playable, not perfect.
Then I turned my attention to the neck. In my previous post I mentioned I was going to use a toothbrush to get the white spots in the black paint, but when I was at the store to get some more ground paint for the legs, I saw a black paint spray can that already had the white spots in it. It’s called “Granit” effect. So I bought a can and here is the result. I used one coat of black and one coat of the “Granit” black.
I like it!
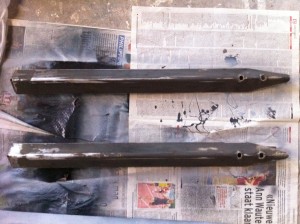
Next where the legs. I got the two back legs back from the blacksmith and they were perfect (at a cost of an amazing 5€!). So I sanded them down, gave them a base coat, two coats of glossy black and new levelers (with rubber protectors).
I also had a look at all the ground wires. NONE of them were connected in the transformer casing. That’s fixed now, my hair no longer reaches for the sky when I press the flipper buttons 😀
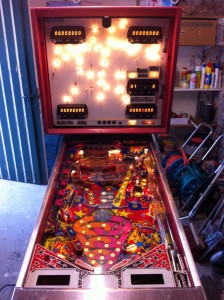
So I’m almost there, but not quite. The CPU board still needs work and the driver board still needs a thorough overhaul. In the mean time here’s a picture of where I am now.
Beheaded and dismembered
Posted: 13 October 2011 Filed under: Cabinet, Pinball Champ '82 | Tags: cabinet, cleaning, neck, painting, pinball, rust, zaccaria Leave a comment »
No, I didn’t kill the pinball machine! I just started some work on the neck and legs.
So the legs have been taken off. The front legs are in good shape. The rusted levelers came out with some WD-40 and except for some rust the legs are fine. Sanding and painting up next. The back legs however are problematic. The rusted levelers are rusted in place and one leg is even bent at the bottom. I considered buying four new legs and levelers, but then I heard that there’s a blacksmith in our village. I should get those two back legs back tomorrow, straightened and levelerless (is that a word?). I’ve also ordered four new levelers.
I’ve also cleaned the head door. The ZM1550 display modules arrived today and these will be soldered in place after the weekend. So the door is ready to take the repaired displays. The guy who sold the modules to me added an extra display controller board which I will modify to take a LED display so it can run on 5V only and I can use it to test the CPU board without the 160V. I found this modification on Leon’s website (see my links for the flipper-pinball-fan site).
I’ve also ordered a new lock for the head and bought four M10 bolts and washers as the originals are missing. Unfortunately the bolts don’t seem to fit, I guess those Zaccarians used non-metric size bolts, I’ll have to check that.
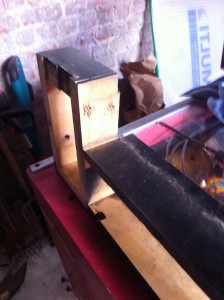
Between the head and the cabinet, there is a neck with a little metal grill. This grill is completely rusted, so I beheaded the pinball machine and took the neck off.
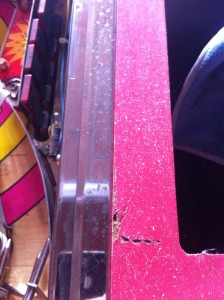
I immediately noticed a couple of things; first, one side of the neck was never painted and second the metal strip holding the cabinet glass was badly rusted.
So I’ve removed everything from the neck and sanded it down for a new paintjob. I’m going to follow David Gersic’s advice (see his zaccaria-pinball site in my links section) on getting the white splatter back on the black paint using a tooth brush.
I’ve also cleaned up the metal strip using some steel wool and chrome polish. Nothing more, I want to play this machine, not put it in a museum.
The metal grill has had it’s ground coat too.
The black paint you see under there is a remnant from painting the same style grill that resides at the bottom back side of the cabinet (nicely hidden). It came out perfect, so that’s why I’m doing this one in the same manner.
I’ve tried to paint the transformer casing with Hammerite paint, but that was a big mistake. Now it needs to harden for 2 weeks until I can sand it off again and start over.
Progress report
Posted: 1 October 2011 Filed under: Cabinet, Electronics, Pinball Champ '82, Playfield | Tags: cleaning, cpu, display, electronics, memory, pinball, playfield, test program, zaccaria, ZM1550 Leave a comment »
Well, the playfield is almost done!
I’ve cleaned out the cabinet and head.
I’ve installed the new microswitch (#52) that let’s the machine know the ball is on the 2nd level playfield.
I’m still missing a few rubbers, but they are in the mail.
The 20A fuse on the transformer box burned out while I was working on the playfield. I stuck a new one in and that burned out too. So I removed all the lights and measured the wiring to look for shorts. There were none. I stuck the lamps back in one by one and now everything works… Weird.
The guy I bought the ZM1550 display modules from mailed me to say he is abroad for work and will send them next week.
I still have the CPU board problem though… I’m going to swap out IC’s 8, 19, 31 and 37 for good measure. The way the CPU reacts to the DIP switch 4 position looks like it’s unable to read the settings once PROGR is off. When I put the switch back in PROGR mode, I can read all the settings, which to me means the RAM is good.
I’m also writing a extensive memory test program that will write alternative 0x55 and 0xAA’s to every memory position between 0x1800 and 0x1BFF. When a test fails it will show which test failed in which nibble at which location on the Player 1 display. This way I should be sure if the memory is good and I can test with both positions of DIP switch 4.
I’ll keep you updated.
More problems solved and the start of cleaning
Posted: 21 September 2011 Filed under: Cabinet, Electronics, Mechanics, Pinball Champ '82, Playfield | Tags: cleaning, condition, drop targets, electronics, mechanics, pinball, playfield, zaccaria Leave a comment »
I went back to the power supply board today for two reasons; I still had that little POWER FAIL circuit to fix and I had trouble finding the reason why my controlled playfield lights weren’t lighting up. So I found that the 5V was missing from CN2.
After some testing I found that it was the fuse and fuseholder were oxidised. Some cleaning took care of that and now the 5V is back.
It occured to me that now that this 5V was back, the POWER FAIL circuit had to be revisited, and low and behold, the POWER FAIL signal is gone. So the circuit wasn’t failing, I had a missing voltage and had completely missed it. DOH! /facepalm
I reconnected the POWER FAIL signal on the CN9 connector on the CPU board and everything still boots up 🙂
After that was all over with, I started disassembling the playfield, documenting everything with a lot of photo’s since I want to be able to put it all back together again too…
Once I removed everything from the top of the playfield, I flipped it over and got to work on the top drop target bank.
I removed the broken drop target, replaced it with the one I got from David from zaccaria-pinball.com (see my links) and flipped the playfield over again.
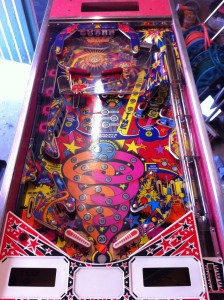
So with that done, I started cleaning. I haven’t done a lot yet, but here’s a picture for you to see how much difference it makes already.
And notice the working lights, what a big difference 5V makes 🙂
While I’m waiting…
Posted: 30 August 2011 Filed under: Cabinet, Mechanics, Pinball Champ '82 | Tags: ball shooter, chrome, coin acceptors, door, pinball, zaccaria Leave a comment »
I took apart the cabinet door. It was in a sorry state and needed a good clean.
I noticed a couple of things: first, the door is German. With that I mean that the coin price tags are for 1, 2 and 5 DM (Deutsch Mark). Unfortunately, inside there are only two coin acceptors, one for 5 Belgain francs and one for 1 DM, and only two microswitches to count the coins dropping, one of which did not test well and needs to be replaced. This explains why two of the coin slots had screws in them. All the wires to the microswitches have been cut and since I don’t have a wiring diagram for the door, I’m waiting until the electronics are fixed so I can start measuring out which lead goes where.
Once I took apart the door, I noticed that the door itself is deformed (bashed in) and that is the reason it doesn’t open and close smoothly anymore. I tried to straighten it out a bit, but as you know, once metal is bent, it’s almost impossible to get it straight again. Atleast it’s out of my skill set (if you have any tips, leave a comment). Anyway, I managed to get it to fit in the frame much better and although still bent, it looks better.
I cleaned off al the little parts and started putting them together again. I do still need to find a replacement coin eject button and preferably a new coin return lid as they are both very rusty. I’ve also removed the old lock and ordered a new one.
Here are some pictures before and after:
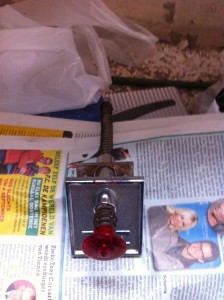
Once that was done, I started on the ball shooter assembly. The rubber at the end was completely dead, a new one is on the way together with all the other rubbers needed for the pinball machine. The rod is in OK condition, but I’ve ordered new springs too. The nice chromed ones. As with my motorcycle, you can never have too much chrome! 🙂
I cleaned the front plate and noticed that some of the chrome is gone. I might send this off to rechrome later on, together with the coin entry casing on the door which is in an even poorer state.












 Flippers.be
 Videolan.org – The home of VLC