ZM1550 test setup
Posted: 27 October 2011 Filed under: Electronics, General | Tags: display, tools, ZM1550 3 Comments »
I’ve been lucky and was able to buy 27 used, untested ZM1550’s. So I’ve made a test setup to get them all sorted out as fast as possible once they arrive.
This is just a little test print on which I soldered three 5 pin connectors and one 4 pin connector and then connect all the segments of both digits together (a with a, b with b, etc.). Then I soldered some wires to connect them to the CN3 connector on the pinball display driver. The shield is connected to pin 1 of CN1 and the decimal points and both anodes are connected to the appropriate pins on CN2 in the same way.
Fortunately, the first ZM1550 module I put in worked, so I know the setup was good.
Unfortunately, not all the modules I put in worked 🙁
So the electronics seem OK…
Posted: 27 October 2011 Filed under: Devil Riders, Electronics | Tags: electronics, pinball, zaccaria Leave a comment »
Well, I’ve got the fuse back into the power supply and sorted out the previous repairs. I tried testing the CPU but apparantly the 27C64 doesn’t work as well as a 2764. Don’t know why, it should work. So I just popped in the original game EPROMS, connected the power supply and the displays and that worked.
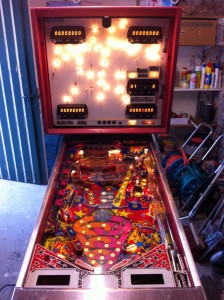
So I connected everything else and here is the result:
I’ve ran the normal diagnostics and except for some lights and switches here and there, everything seems to work. The little motorcycle in the head moves a little bit, but since there still are some wires hanging there connected to nothing, that doesn’t surprise me.
The biggest job is going to be cleaning up… this machine is VERY dirty.
OMG it still works!
Posted: 26 October 2011 Filed under: Devil Riders, General | Tags: neon tube, pinball, zaccaria Leave a comment »
While putting the new parts I got in the mail today in my work room, I checked the GI on the Devil Riders and…
OMG THE NEON STILL WORKS! After 27 years! Amazing…
Me so happy!
First look at the Devil Riders
Posted: 22 October 2011 Filed under: General Leave a comment »
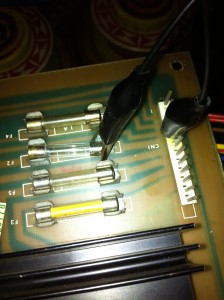
Well, I took a closer look at the Devil Riders. Except for a broken fuse clip the power supply is in good shape. I don’t know yet if I’m going to replace the connectors to the originals or if I’m going to leave the new ones. Depends on how easy it will be to find new ones I guess.
The CPU seems to boot as well, at least the LED comes on after a short while. I’ll be getting some 2764 EPROMs next week so I can do some thorough testing. I’ve removed the battery. Didn’t have any vinegar handy, will clean up tomorrow.
In the mean time I started converting one of the 8-digit display drive boards I got from the guy who sold me the ZM1550’s for the Pinball Champ to work with LED 7-segment displays and 5V only (see Leon’s site for a how to). This will allow me to work on the CPU boards outside of the machines as I won’t need the 160V for the original displays.
I’ve also had a closer look at the playfield and noticed that the paint damage around the 3,000 insert is due to the insert having dropped down a few milimeters. This will have to be fixed.
Tomorrow I start desoldering the components off the Pinball Champ CPU board… wish me patience 😉
Pinball number 2
Posted: 20 October 2011 Filed under: Devil Riders, General | Tags: condition, pinball, zaccaria Leave a comment »
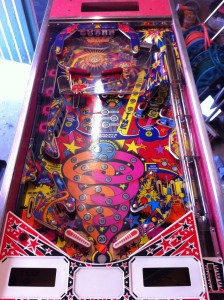
Well, now I’ve done it! I’ve gone and bought another machine. This time it’s a Devil Riders, also from Zaccaria, and also a 2nd generation. Mechanically it looks in better shape than the Pinball Champ, but the electronics have been “repaired” by an amateur (according to the seller). But for 100€ I’m not too bothered about it. The machine looks complete, except for 2 leg bolts.
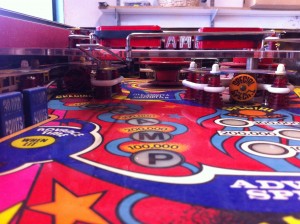
Here are some pictures I took.
I’m going to test the CPU board of this machine in the other machine and make it work. That way I can compare the two boards and see where the problem is with my Pinball Champ CPU board. I’ll also start taking the Devil Riders apart and make a list of things I need to order so I can minimise shipping cost.
As always, I’ll keep you posted!
Humpty Dumpty back together again
Posted: 18 October 2011 Filed under: Cabinet, Pinball Champ '82, Playfield | Tags: cabinet, legs, neck, pinball, zaccaria Leave a comment »
It’s starting to look like a pinball machine agian!
I’ve put the playfield back together and noticed that the left top flipper didn’t work and the right top flipper was weak. A quick pass with some sanding paper between the leaf contacts and they’re both tiptop again.
Here are some detail shots. Remember, I’m making this pinball playable, not perfect.
Then I turned my attention to the neck. In my previous post I mentioned I was going to use a toothbrush to get the white spots in the black paint, but when I was at the store to get some more ground paint for the legs, I saw a black paint spray can that already had the white spots in it. It’s called “Granit” effect. So I bought a can and here is the result. I used one coat of black and one coat of the “Granit” black.
I like it!
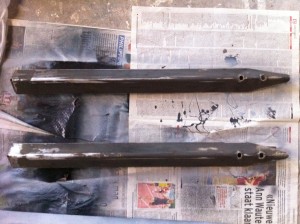
Next where the legs. I got the two back legs back from the blacksmith and they were perfect (at a cost of an amazing 5€!). So I sanded them down, gave them a base coat, two coats of glossy black and new levelers (with rubber protectors).
I also had a look at all the ground wires. NONE of them were connected in the transformer casing. That’s fixed now, my hair no longer reaches for the sky when I press the flipper buttons 😀
So I’m almost there, but not quite. The CPU board still needs work and the driver board still needs a thorough overhaul. In the mean time here’s a picture of where I am now.
Beheaded and dismembered
Posted: 13 October 2011 Filed under: Cabinet, Pinball Champ '82 | Tags: cabinet, cleaning, neck, painting, pinball, rust, zaccaria Leave a comment »
No, I didn’t kill the pinball machine! I just started some work on the neck and legs.
So the legs have been taken off. The front legs are in good shape. The rusted levelers came out with some WD-40 and except for some rust the legs are fine. Sanding and painting up next. The back legs however are problematic. The rusted levelers are rusted in place and one leg is even bent at the bottom. I considered buying four new legs and levelers, but then I heard that there’s a blacksmith in our village. I should get those two back legs back tomorrow, straightened and levelerless (is that a word?). I’ve also ordered four new levelers.
I’ve also cleaned the head door. The ZM1550 display modules arrived today and these will be soldered in place after the weekend. So the door is ready to take the repaired displays. The guy who sold the modules to me added an extra display controller board which I will modify to take a LED display so it can run on 5V only and I can use it to test the CPU board without the 160V. I found this modification on Leon’s website (see my links for the flipper-pinball-fan site).
I’ve also ordered a new lock for the head and bought four M10 bolts and washers as the originals are missing. Unfortunately the bolts don’t seem to fit, I guess those Zaccarians used non-metric size bolts, I’ll have to check that.
Between the head and the cabinet, there is a neck with a little metal grill. This grill is completely rusted, so I beheaded the pinball machine and took the neck off.
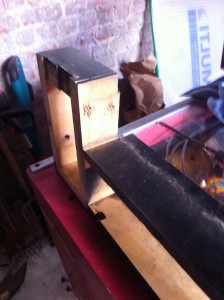
I immediately noticed a couple of things; first, one side of the neck was never painted and second the metal strip holding the cabinet glass was badly rusted.
So I’ve removed everything from the neck and sanded it down for a new paintjob. I’m going to follow David Gersic’s advice (see his zaccaria-pinball site in my links section) on getting the white splatter back on the black paint using a tooth brush.
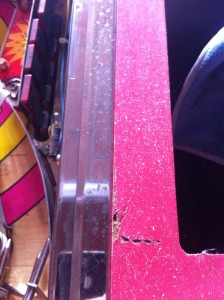
I’ve also cleaned up the metal strip using some steel wool and chrome polish. Nothing more, I want to play this machine, not put it in a museum.
The metal grill has had it’s ground coat too.
The black paint you see under there is a remnant from painting the same style grill that resides at the bottom back side of the cabinet (nicely hidden). It came out perfect, so that’s why I’m doing this one in the same manner.
I’ve tried to paint the transformer casing with Hammerite paint, but that was a big mistake. Now it needs to harden for 2 weeks until I can sand it off again and start over.
Progress report
Posted: 1 October 2011 Filed under: Cabinet, Electronics, Pinball Champ '82, Playfield | Tags: cleaning, cpu, display, electronics, memory, pinball, playfield, test program, zaccaria, ZM1550 Leave a comment »
Well, the playfield is almost done!
I’ve cleaned out the cabinet and head.
I’ve installed the new microswitch (#52) that let’s the machine know the ball is on the 2nd level playfield.
I’m still missing a few rubbers, but they are in the mail.
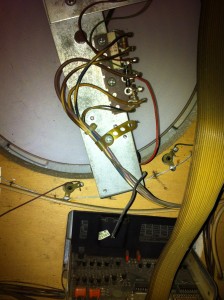
The 20A fuse on the transformer box burned out while I was working on the playfield. I stuck a new one in and that burned out too. So I removed all the lights and measured the wiring to look for shorts. There were none. I stuck the lamps back in one by one and now everything works… Weird.
The guy I bought the ZM1550 display modules from mailed me to say he is abroad for work and will send them next week.
I still have the CPU board problem though… I’m going to swap out IC’s 8, 19, 31 and 37 for good measure. The way the CPU reacts to the DIP switch 4 position looks like it’s unable to read the settings once PROGR is off. When I put the switch back in PROGR mode, I can read all the settings, which to me means the RAM is good.
I’m also writing a extensive memory test program that will write alternative 0x55 and 0xAA’s to every memory position between 0x1800 and 0x1BFF. When a test fails it will show which test failed in which nibble at which location on the Player 1 display. This way I should be sure if the memory is good and I can test with both positions of DIP switch 4.
I’ll keep you updated.
















 Flippers.be
 Videolan.org – The home of VLC