Zaccaria number 3
Posted: 25 April 2014 Filed under: General, Time Machine | Tags: pinball, zaccaria Leave a comment »
I was weak last week…
While looking through the wanted adds on marktplaats.nl I saw a Time Machine for sale. When I looked up the sellers contacts, I noticed he lived about 3 km away. So I called him, just to go have a look and meet another enthusiast.
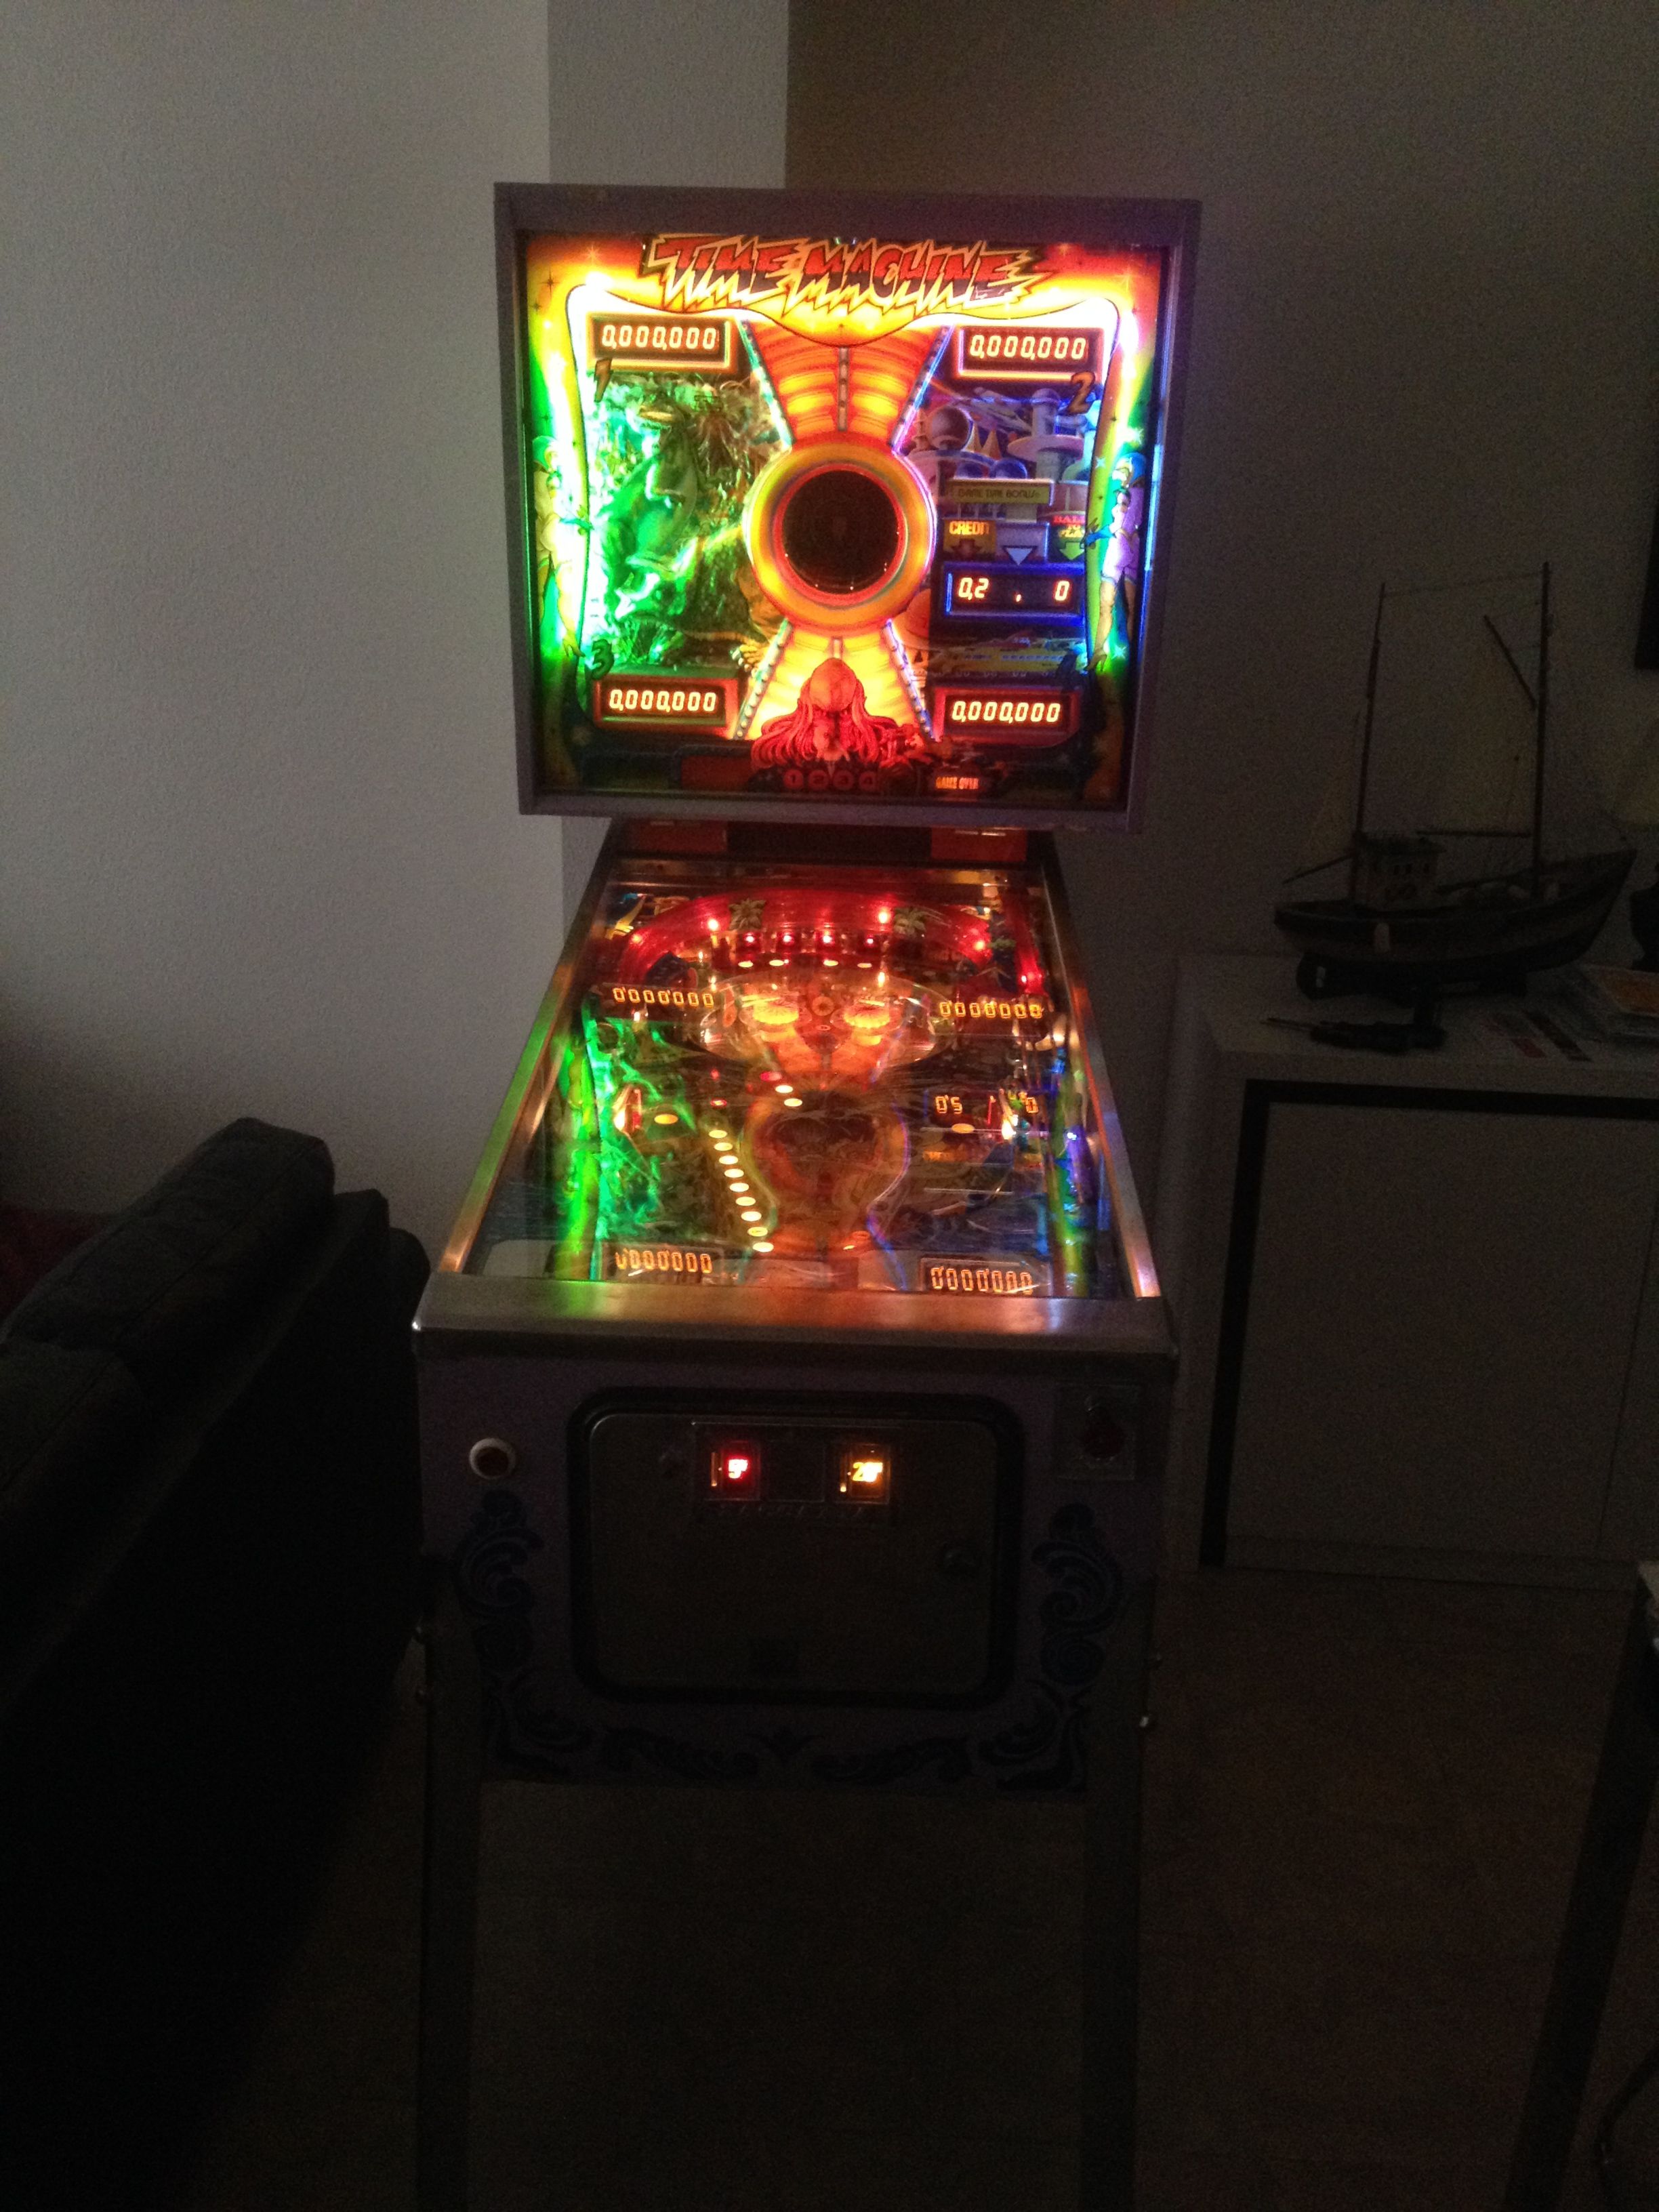
The Time Machine was set up and working. It needed a bit of cleaning, fixing the woodwork and replacing of a few lamps, but everything was working, playfield was ok, ramps and plastics were in order.
So we talked a bit and he mentioned that he had five Zaccaria’s in total. A Clown, which was set up next to the Time Machine, already sold and waiting for pickup; A Soccer Kings of which I could see the backbox, but the body was hidden behind other pinball machines and other stuff; An Earth Wind Fire, which he was going to get ready for sale next; And a Robot, which I wanted to see. I’ve only seen this machine once before and I would like to have one. After some digging and moving stuff around, the Robot was uncovered, set up and everything. He switched it on and it played, but without sound. Could be a minor issue, could be something bigger (see this post).
By seeing both the Time Machine and the Robot, I was already thinking where I could put them in my apartment, so I offered a price for both. Unfortunately he wasn’t sure about letting go of the Robot. You don’t see it very often and he likes the theme, just like I do. Too bad.
So I went home…
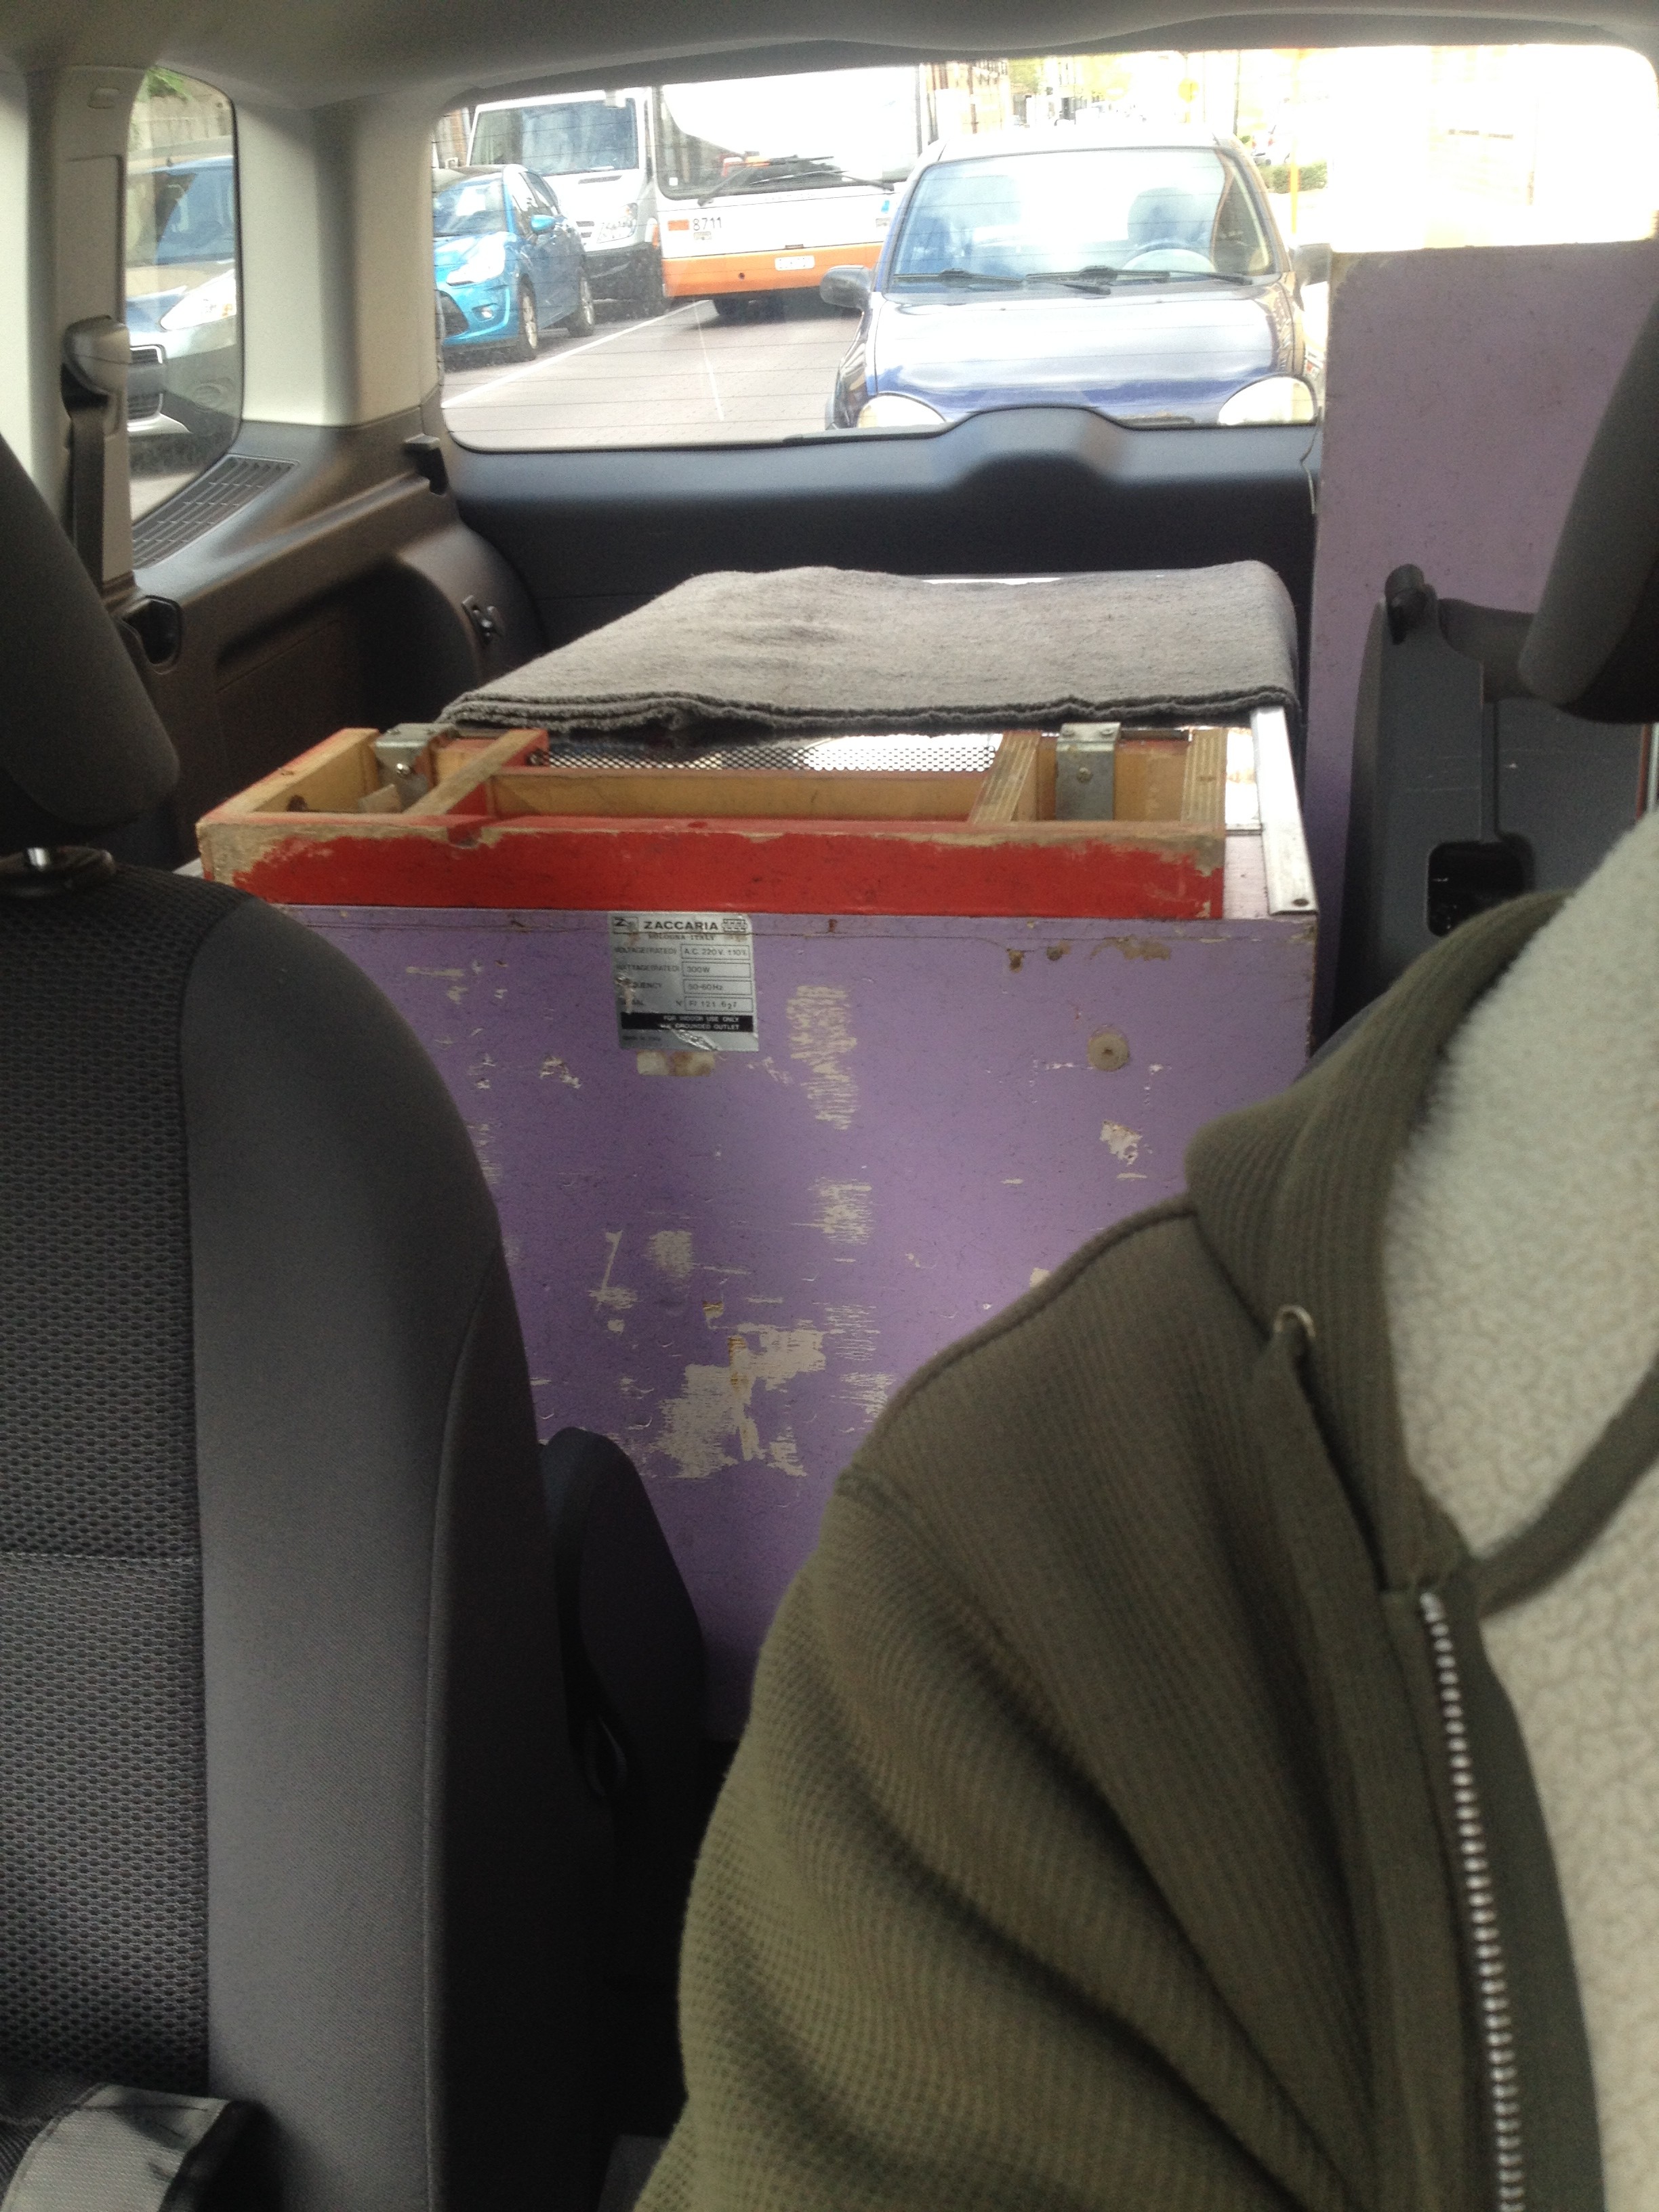
… with the Time Machine!
I can tell you it’s a very heavy machine if you have to carry it inside on your own (that’s why I took the backbox off before putting it in the car).
It’s a very nice machine with interesting game mechanics and it now has a proud place in my living room.
Now if I could only finish the work on the Pinball Champ displays and CPU board so I can start inviting friends for Zaccaria pinball parties.
Working on a replacement CPU board
Posted: 26 January 2014 Filed under: Electronics, General, Pinball Champ '82 | Tags: cpu, electronics, eprom, memory, zaccaria Leave a comment »
Well, here we go. I bought an old, untested CPU board on ebay quite a while ago. It clearly had some battery leakage problems that had been cleaned up by the previous owner, so now I need to fix the rest and get it up and running again.
Step 1: asses the damage.
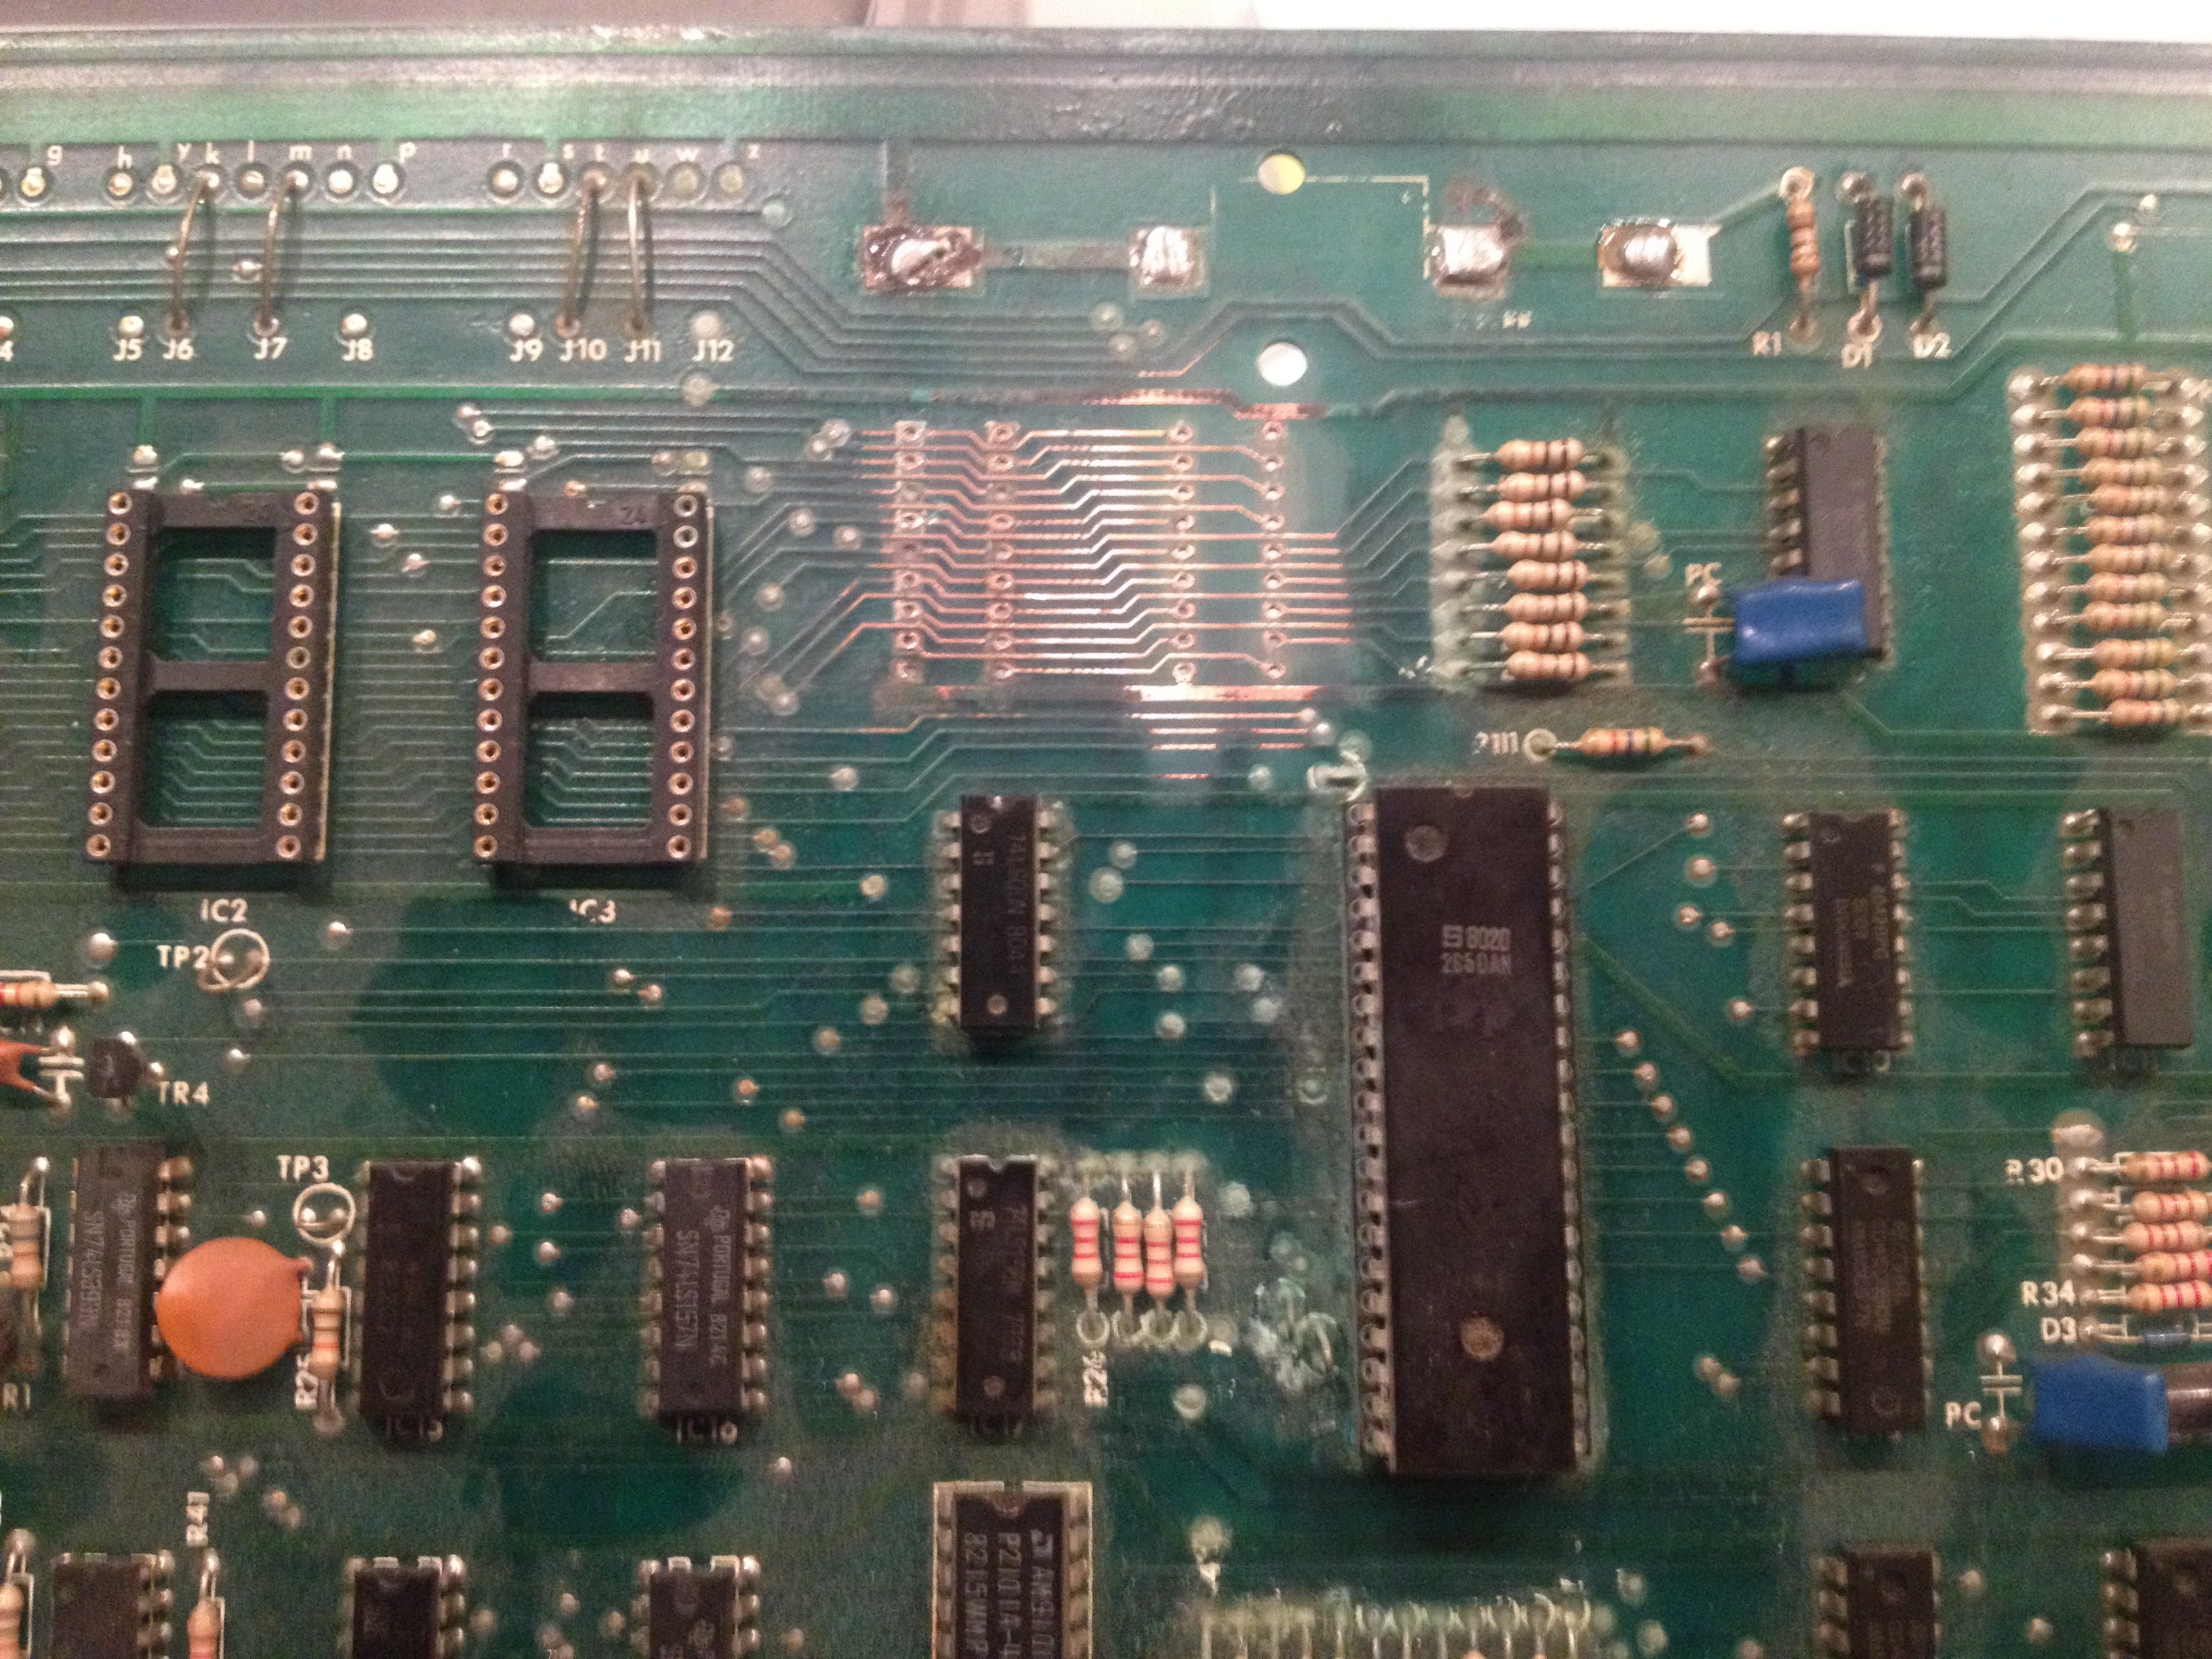
The CPU board when I received it
I noticed some of the copper was missing where the IC fittings used to be, so I first started with measuring the tracks that were still there. A lot of them are broken and not making the right connections. The breaks were too big to fix by covering them with a bit of solder on the component side of the PCB, so I will need to run wires on the solder side of the PCB. But first, I put in the missing IC fittings for the RAM chips.
Next I removed the 24-pin IC fittings for the three 2532 EPROMs. I replaced them with three 28-pin fittings so I can put in two 2764 EPROMs, which are needed to use David Gersic’s Freeplay ROMs and are much easier to come by. Using three fittings still gives me the option to put in the original 2532 EPROMs if needed. This also involves changing the jumpers just above the EPROM IC fittings.
As I am not going to reuse the IC fittings, I just cut them off.

Cutting away the old IC fittings.
The remaining “feet” were removed with a soldering iron. Once done, I just popped in the new 28-pin IC fittings and soldered them in place.

New fittings for the EPROMs and RAMs in place
All done.
Now I started measuring the connections on the new fittings and found that more than half were bad. This is going to be a lot of work. I’ve started wiring on the back side of the PCB, but time ran out, so I’m not finished yet. I have to redo connections between both RAM fittings and between the left RAM and right EPROM fittings. There was clearly a lot of damage from the battery leakage.

First two connections repaired, many to go…
I will keep you updated on my progress.
Upcoming projects
Posted: 7 January 2014 Filed under: Devil Riders, General, Pinball Champ '82 | Tags: cpu, display, driver board, electronics, pinball, zaccaria Leave a comment »
A new year, some new resolutions… Let’s get these machines finished.
The Pinball Champ’s displays are failing again, so I’m going to replace them with LEDs. The 7 segment displays are on order (estimated delivery 28 January), I have the PCB etching kit ready and I’m almost done with the PCB design (largely stolen from Leon).

Display PCB design
One of my pinball friends Eric exchanged my Pinball Champ backglass with a less damaged one. He only used his to hang on a wall in his gameroom and didn’t mind exchanging it for mine. One of the projects will be to fix the paint on the glass with some clear varnish. He also exchanged his Zaccaria etched playfield glass for my blank one, so now my Devil Riders also has an original playfield glass. Thanks again Eric!
Then finally I have scored myself a new 2nd generation CPU board. I’ve given up on the one I had for now, I might revisit it in the future, but it’s not very likely. The new CPU board has a bit of battery leakage damage around and under the memory chips that I need to fix. Hopefully I can get it to work 100% so I can put it in the Pinball Champ and get the Devil Riders’ CPU board back. Then I need to recheck all the electronics in the Devil Riders as my last CPU board test caused sparks on both the Power Supply and Driver board.
If all goes well both machines should be up and running by April 5th.
I’ll keep you posted.
Legs
Posted: 23 April 2012 Filed under: Devil Riders, General | Tags: chrome, cleaning, legs, pinball, zaccaria 2 Comments »
So now that I moved to my new place and I invited a bunch of friends over for a little house-warming, I found the need to get my pinball machines in my little game-room. The installation of the Pinball Champ was easy enough, but when I wanted to set up the Devil Riders I noticed that I hadn’t started on the legs yet.

- Legs before cleaning
So I quickly got out my metal sponge (the one you use after failed cooking experiments 😉 ) and got to work.

- Legs after cleaning
I got some new levelers and chrome leg bolts and now the Devil Riders is back on it’s feet again.
Pinball Champ ’82 as good as done!
Posted: 6 November 2011 Filed under: General, Pinball Champ '82 | Tags: pinball, zaccaria Leave a comment »
It’s finished! The Pinball Champ ’82 has been put together again using the CPU board from the Devil Riders, using David’s freeplay images (see Zaccaria-Pinball in my links) and me and my dad played a few games. It was great!

My first pinball machine
Ofcourse during the games we played I noticed a few more things I need to fix, but nothing major. A light needs to be checked/replaced, the doorframe needs to be repainted and the backglass is missing a black siderail and could do with a new lift rail. Also, the player 2 display has one digit that acts up from time to time. I’ll have a look at that too.

The door
Unfortunately there’s a whole in the paint on the backglass just above a lamp. It’s quite an eye-sore. I’ll have to see if there’s a way to fix this…

Needs fixing...
The machine plays perfectly and I’m really happy with the result. Here’s a little movie with the machine in attract mode. Enjoy…
ZM1550 test setup
Posted: 27 October 2011 Filed under: Electronics, General | Tags: display, tools, ZM1550 3 Comments »
I’ve been lucky and was able to buy 27 used, untested ZM1550’s. So I’ve made a test setup to get them all sorted out as fast as possible once they arrive.

The test setup
This is just a little test print on which I soldered three 5 pin connectors and one 4 pin connector and then connect all the segments of both digits together (a with a, b with b, etc.). Then I soldered some wires to connect them to the CN3 connector on the pinball display driver. The shield is connected to pin 1 of CN1 and the decimal points and both anodes are connected to the appropriate pins on CN2 in the same way.
Fortunately, the first ZM1550 module I put in worked, so I know the setup was good.

This one works!
Unfortunately, not all the modules I put in worked 🙁

This one doesn't
OMG it still works!
Posted: 26 October 2011 Filed under: Devil Riders, General | Tags: neon tube, pinball, zaccaria Leave a comment »
While putting the new parts I got in the mail today in my work room, I checked the GI on the Devil Riders and…

OMG it still works!
OMG THE NEON STILL WORKS! After 27 years! Amazing…
Me so happy!
First look at the Devil Riders
Posted: 22 October 2011 Filed under: General Leave a comment »
Well, I took a closer look at the Devil Riders. Except for a broken fuse clip the power supply is in good shape. I don’t know yet if I’m going to replace the connectors to the originals or if I’m going to leave the new ones. Depends on how easy it will be to find new ones I guess.

Broken fuse clip

/sad

/cry
The CPU seems to boot as well, at least the LED comes on after a short while. I’ll be getting some 2764 EPROMs next week so I can do some thorough testing. I’ve removed the battery. Didn’t have any vinegar handy, will clean up tomorrow.
In the mean time I started converting one of the 8-digit display drive boards I got from the guy who sold me the ZM1550’s for the Pinball Champ to work with LED 7-segment displays and 5V only (see Leon’s site for a how to). This will allow me to work on the CPU boards outside of the machines as I won’t need the 160V for the original displays.
I’ve also had a closer look at the playfield and noticed that the paint damage around the 3,000 insert is due to the insert having dropped down a few milimeters. This will have to be fixed.

Some playfield damage
Tomorrow I start desoldering the components off the Pinball Champ CPU board… wish me patience 😉
Pinball number 2
Posted: 20 October 2011 Filed under: Devil Riders, General | Tags: condition, pinball, zaccaria Leave a comment »
Well, now I’ve done it! I’ve gone and bought another machine. This time it’s a Devil Riders, also from Zaccaria, and also a 2nd generation. Mechanically it looks in better shape than the Pinball Champ, but the electronics have been “repaired” by an amateur (according to the seller). But for 100€ I’m not too bothered about it. The machine looks complete, except for 2 leg bolts.
Here are some pictures I took.

Head

Playfield

Coindoor

A button, really?

All that work to put that door button in instead of replacing a faulty outhole microswitch... AARGH

Electronics

Why replace connectors if you can solder?

I guess the "Power Fail" signal will be missing

What did you expect after almost 30 years?

Inside head door

If you don't have a connector and can't solder, leave it hanging...
Some playfield damage

Looks quite clean

Transformer box is open. Hope it still works.
I’m going to test the CPU board of this machine in the other machine and make it work. That way I can compare the two boards and see where the problem is with my Pinball Champ CPU board. I’ll also start taking the Devil Riders apart and make a list of things I need to order so I can minimise shipping cost.
As always, I’ll keep you posted!
Parts incoming!
Posted: 9 September 2011 Filed under: Electronics, General, Mechanics, Pinball Champ '82 | Tags: buy, cpu, electronics, mechanics, memory, pinball, zaccaria Leave a comment »
Although I’m in Sweden this week and the next, I haven’t forgotten about my pinball machine…
I’ve been franticly searching the Internet looking for those elusive parts that I so dearly need to get the machine back to pristine condition and I think I’ve done it.
From the Multigame site (see the links section) I’ve ordered a rubber set, a new pinball, a doorlock and some more small parts, together with some cleaning materials.
David, from www.zaccaria-pinball.com has sold me a spare “H” target and a replica door sticker and they are on the way.

David's spare "H"
And then the two memory chips… The 6514J-0 was relatively easy to find. A search on ebay found three vendors in the US, so I ordered one and it’s on the way. The 2114L was an alltogether different story. No hits on ebay or anywhere else.
It was even hard to find the correct datasheets for this memory chip, but after going through dozens of datasheets, I finally found the correct one. I’ve put it up here in the datasheets section on the right, so you don’t have to go through that experience yourself.
I found out that Texas Instruments made the same memory at different speeds, after looking up those datasheets and checking the TI speeds with the ones from Intersil, I started looking for a TMS2114L-45NL. Again, no luck 🙁
Then I noticed that the top of the Texas Instruments datasheets state “Previously Called TMS40L45”, so I searched for a TMS40L45-45NL on ebay and BINGO, there’s one on the way 🙂
According to the datasheets it should work, but I guess you never know until you put it in the CPU board and run the test.
Since I spend a lot of time looking for datasheets, I’ve decided to put them up here for anyone else that might be restoring a similar machine…
 Videolan.org – The home of VLC